Open Air Engine Shed | |
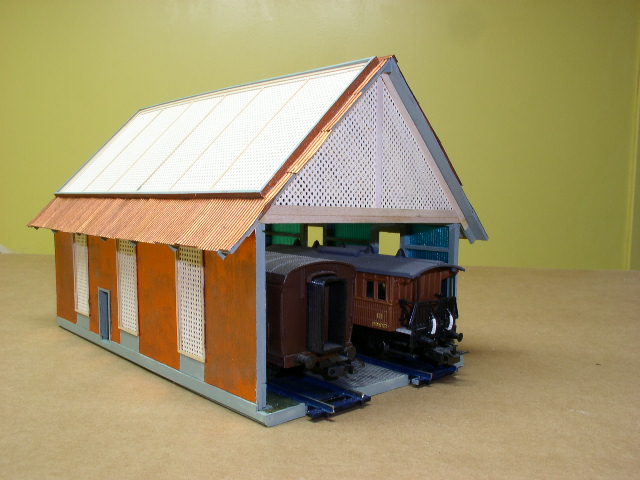 |
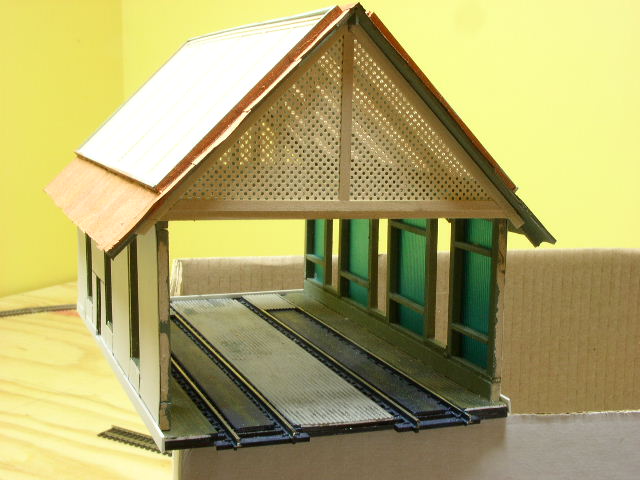
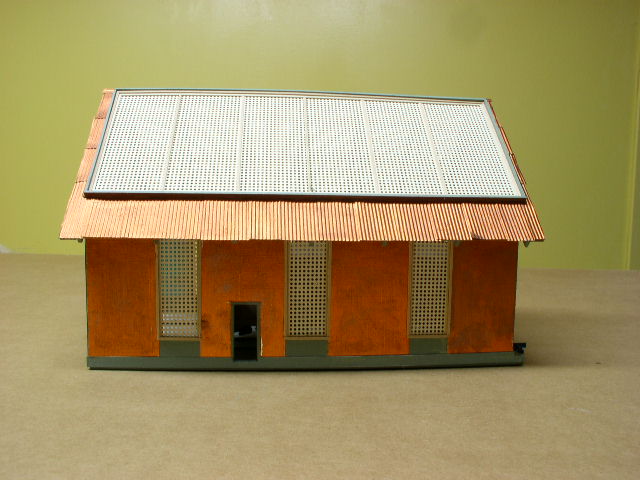
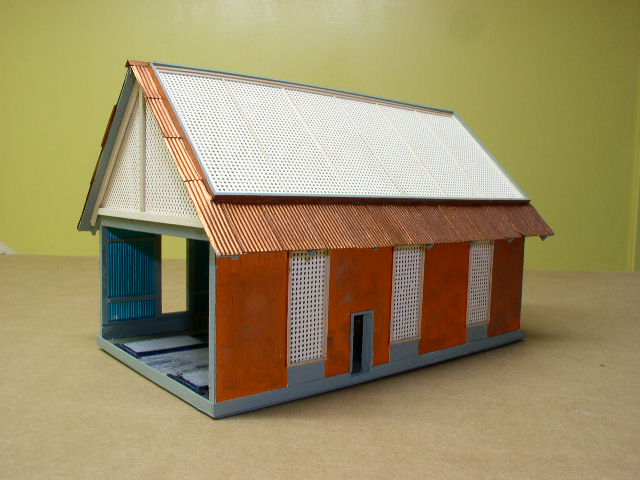
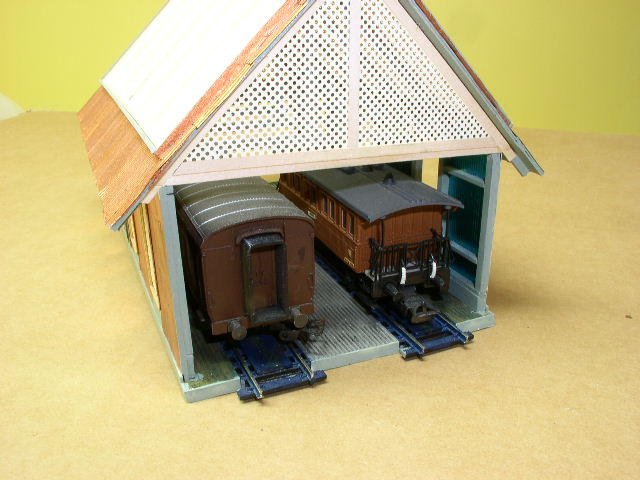
The completed open air engine shed with two European passenger cars. More detail will be added once it is placed on my layout. |
| I bought an O scale ore bin kit on eBay and the seller sent me the corresponding mine kit as a bonus. The mine kit was missing pieces so I decided to build an HO scale engine house out of it. | |
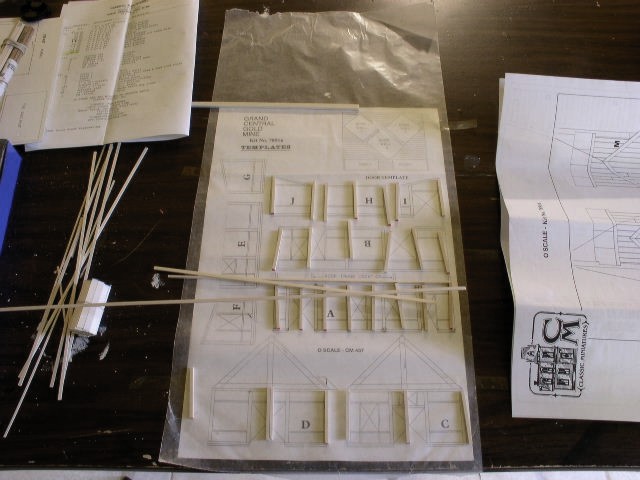 |
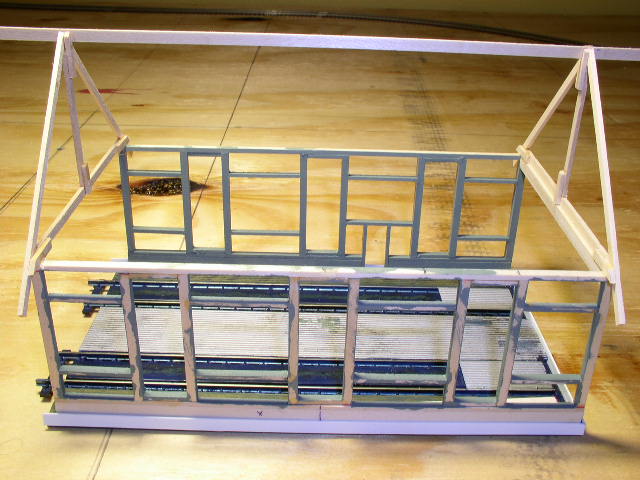
The wall framing and the roof trusses were built out of the basswood strips from the kit. The O scale plans were used so the mine's shape could be retained. |
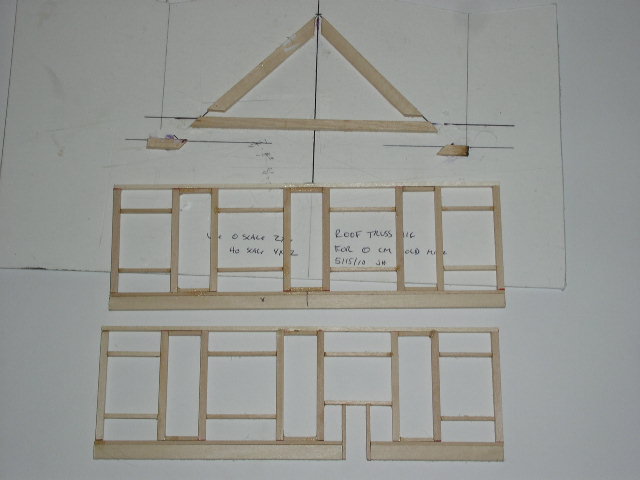 |
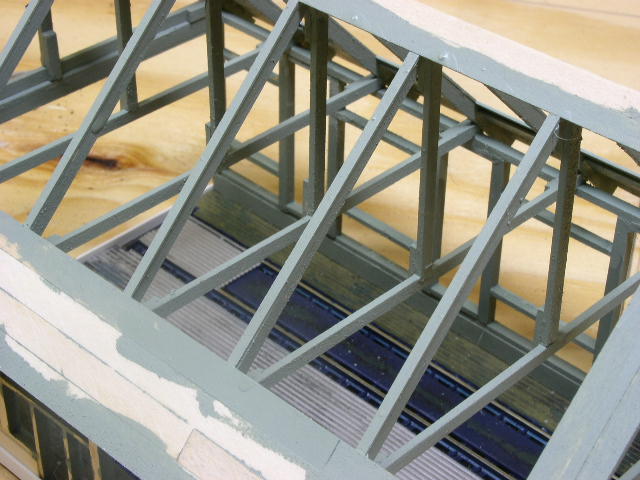
The walls were built on the O scale plans but large windows were framed in. A jig was constructed to build the roof trusses. |
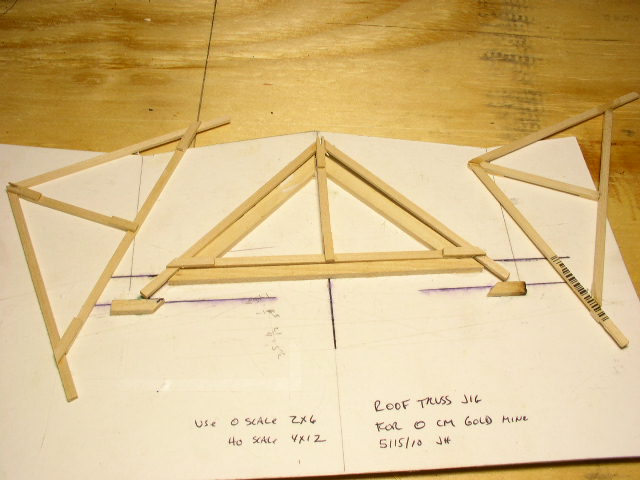 |
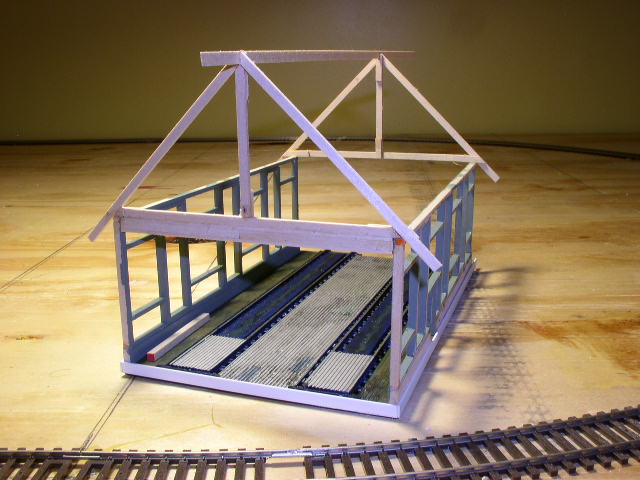
The seven roof trusses being built. I worked on these on Saturday evenings while watching The Three Stooges on TV. |
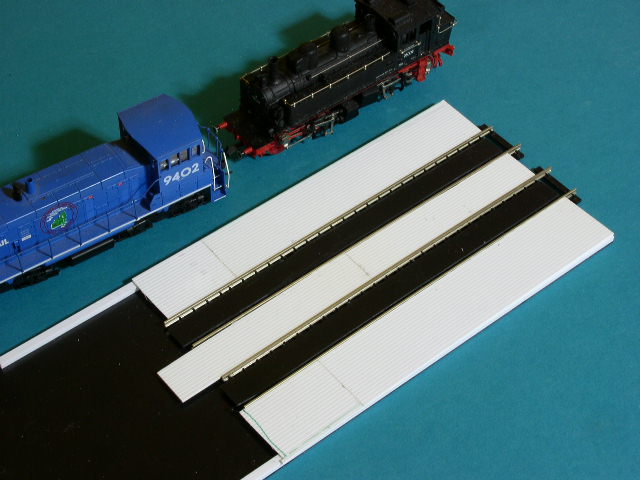 |
The base was made from a sheet of .060 styrene sheet with two sections of Atlas code 100 9" straight track glued on. More styrene was glued on to make the floor level with the top of the rail. |
 |
 |
| The inside walls were painted light green. Walls, two roof trusses and the roof ridge were glued to the base. | |
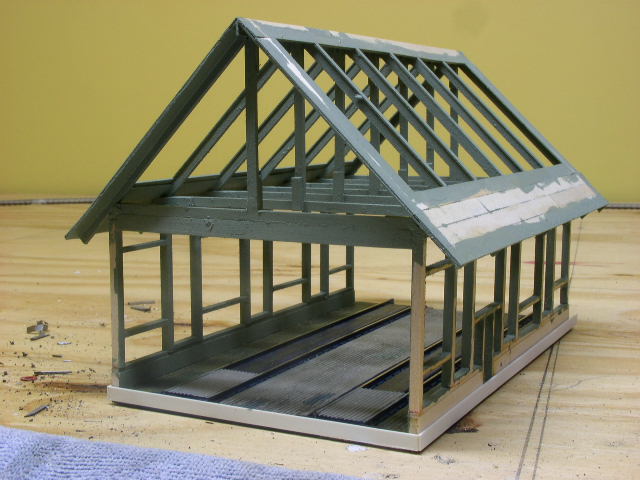 |
The remainder of the roof trusses have been installed and painted to match the interior walls. |
 |
Since this is an open air engine shed, I wanted some kind of skylight. The roof boards have been installed and the skylight opening remains. |
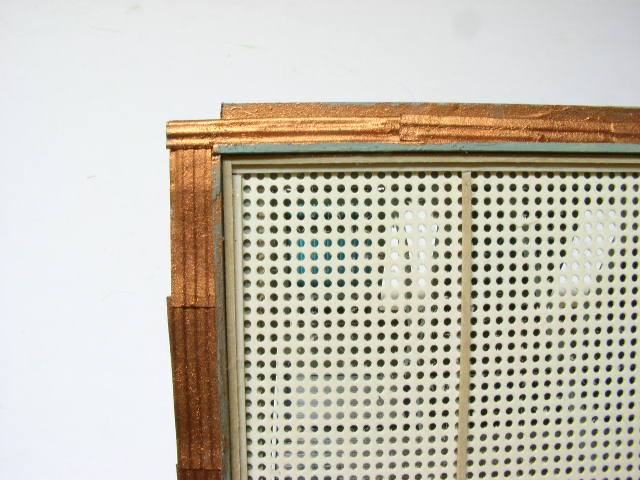 |
Instead of a conventional translucent material, I chose this perforated paper that I purchased several years ago. I built a stripwood frame, painted it, and glued the paper in without any type of coating. Battens (basswood strips) were glued over the paper where it touched the trusses. |
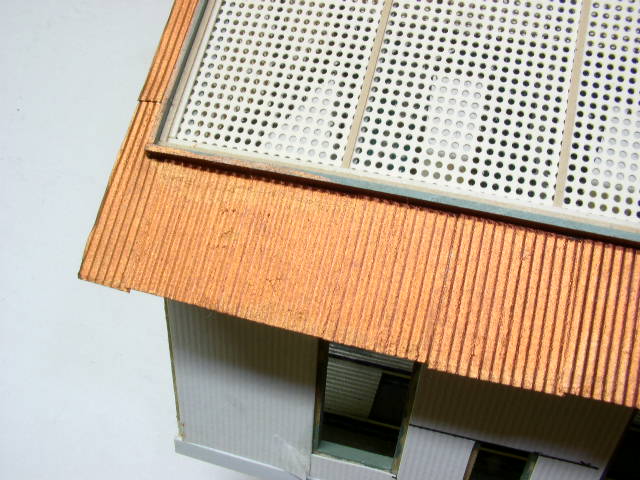 |
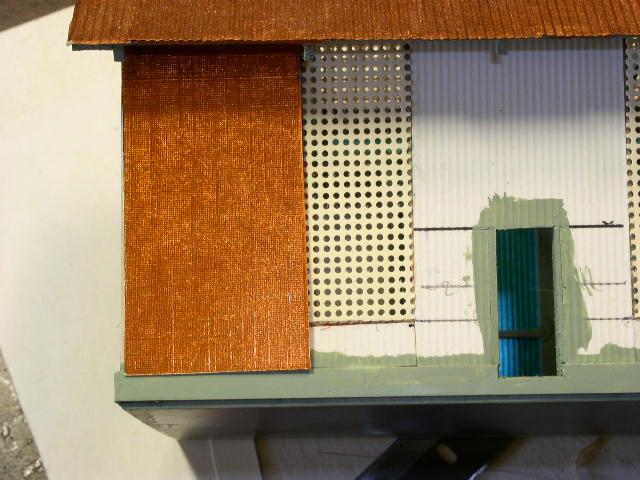
The corrugated material came with the mine kit. It is white paper and I painted it with Testors Copper. |
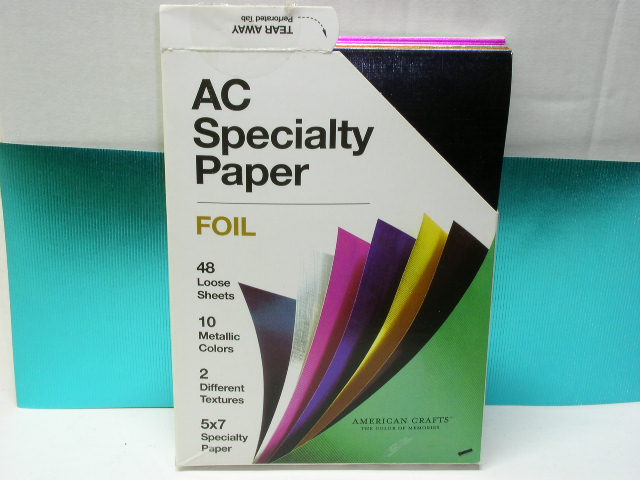 |
Siding. Whatever I chose may not look good when viewed from the inside, so I decided on a two layer siding: one to show on the inside and the other on the outside. I found these cardstock papers at Hobby Lobby and thought they would have interesting implications for my models. I chose a blue scribed sheet, cut it into sections to fit the studs and glued them in. The lines are vertical. |
 |
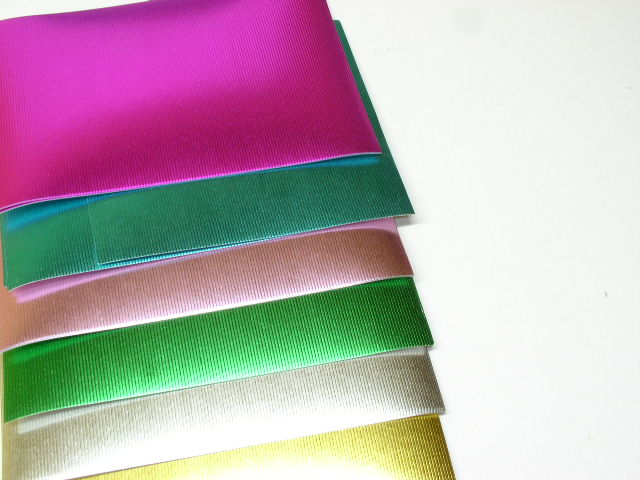 |
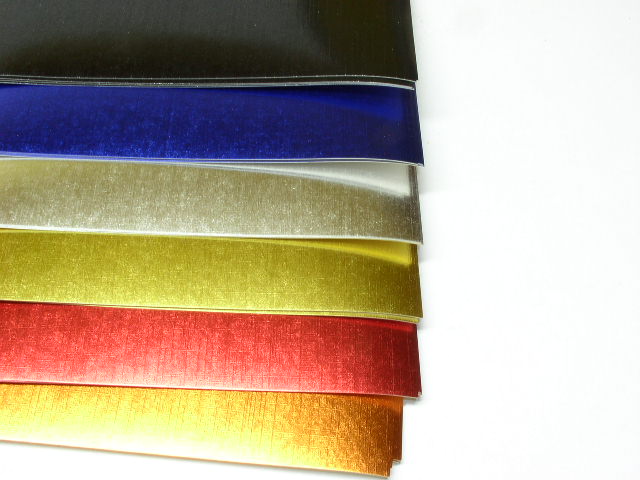
| The package contains two different patterns: a linen
surface and scribing. The colors are metallic and bright. |
|
 |
This is an interior pic after the aqua scribed cardstock is glued on. |
 |
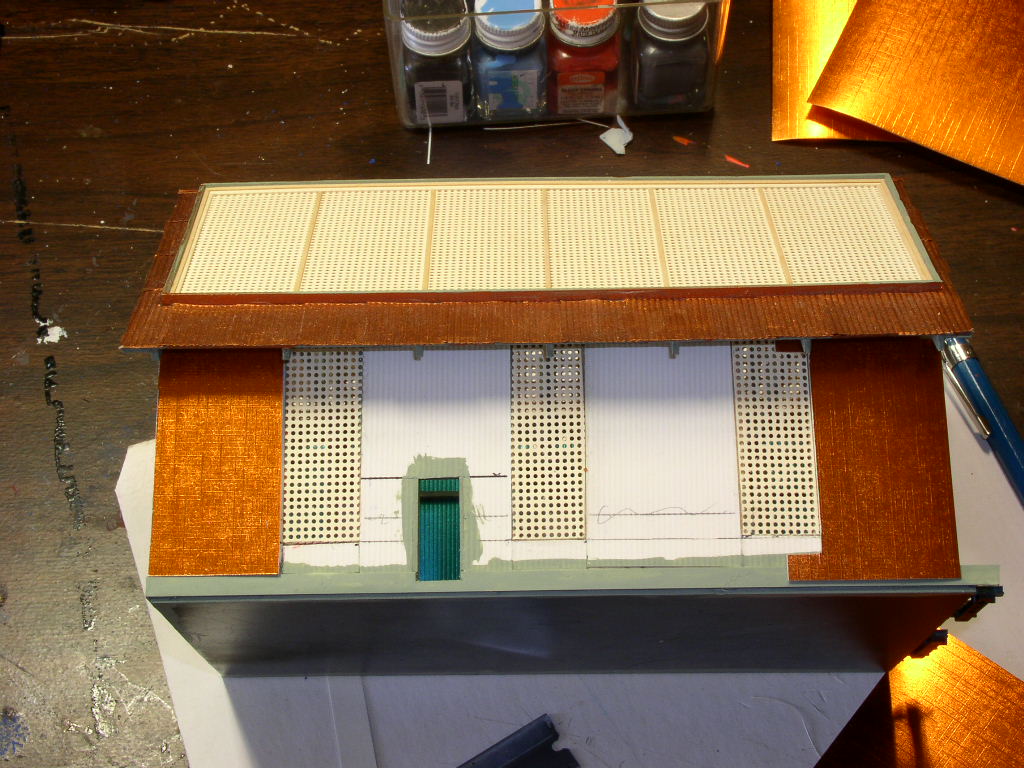 |
| I painted the foundation the same light green as the framework, let it dry, and added more of the perforated paper as windows. Then the copper foil cardstock is cut and glued on as siding. | |
 |
A piece of the cardstock is turned over, cut and painted to fit under the windows. This gives the appearance that the foundation continues up to the bottom of the windows. Basswood strips are glued on to cover the joint where the siding meets the window material. |
 |
 |